How to Clean Vinyl Records Safely at Home Without Damaging the Grooves

This post covers the safest, most effective methods for cleaning vinyl records at home—everything from quick dry brushing to deep wet cleaning and vacuum systems. Dirty records don't just sound bad (pops, clicks, and surface noise ruin the listening experience); accumulated grime also wears down stylus tips and damages grooves over time. Learning proper cleaning technique protects both the collection and the turntable investment.
Can you clean vinyl records with just water?
Yes, but only if it's distilled water—and even then, water alone won't remove oily fingerprints or deep grime. Tap water contains minerals and chlorine that can leave deposits in the grooves, so it's never a safe choice. Distilled water works for a light rinse, but a proper cleaning solution dissolves oils and lifts particulates that plain water can't touch.
Here's the thing: many collectors assume a quick wipe with a damp cloth does the job. It doesn't. A record groove is a microscopic space. Dust, skin oils, and factory release agents settle deep inside those walls. Water alone rinses surface dust at best. For anything more than a brand-new record with light static, a dedicated cleaning fluid or bath is necessary.
That said, distilled water does play a role. Professionals and serious hobbyists often mix their own solutions using distilled water, isopropyl alcohol, and a drop of wetting agent like Tergitol 15-S-9 (a surfactant trusted by archivists at institutions like the Library of Congress). The alcohol breaks down oils. The surfactant reduces surface tension so the fluid penetrates the groove. The distilled water carries it all away without leaving mineral spots.
What's the best way to clean vinyl records at home?
The best method depends on the record's condition and the collector's budget, but wet cleaning with a microfiber or velvet pad (or a bath system) followed by air drying delivers the safest, most thorough results for most people. Deep cleans call for a record cleaning machine—either a manual bath like the Spin-Clean or a vacuum unit like the Record Doctor.
Below are the four main approaches, ranked from lightest to most intensive.
1. Dry brushing before every play
A carbon fiber brush is the first line of defense. Brands like Mobile Fidelity Sound Lab and Audio-Technica make brushes that sit on the spinning platter, whisking away loose dust and reducing static. The technique matters: let the record spin on the turntable, gently place the brush on the surface, and after a few rotations, angle the fibers toward the label before lifting. Don't drag the brush across the grooves horizontally—that can push debris deeper.
It takes ten seconds. Do it every time. Surface dust grinds into vinyl under stylus pressure, so removing it before the needle drops prevents incremental groove damage.
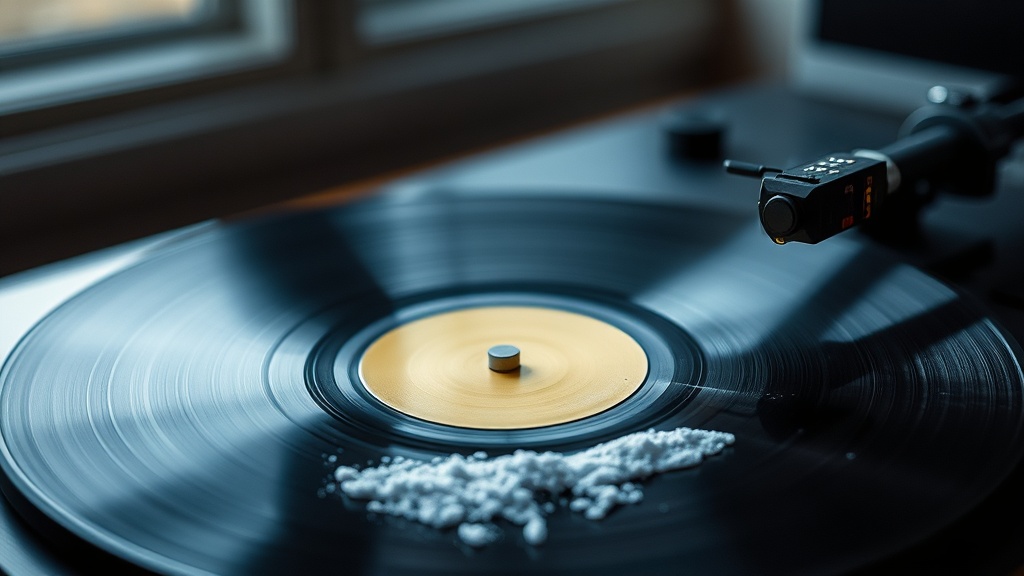
2. Wet cleaning with a microfiber cloth or pad
For records that look clean but sound noisy, a wet wipe with a proper solution often fixes the problem. Use a plush microfiber cloth or a dedicated pad like the Discwasher D4 system. Spray the solution onto the pad, not the record. Wipe in a circular motion, following the groove direction. Flip and repeat.
The catch? Too much pressure warps the groove walls. Too little leaves residue. A light, steady touch is the sweet spot. And always let the record air dry on a clean rack before it goes back into the sleeve.
3. Bath systems (the Spin-Clean method)
The Spin-Clean Record Washer MKII is a staple in home collections for good reason. Records sit in a bath of cleaning fluid and distilled water, rotating past soft brushes that scrub both sides simultaneously. The fluid pulls dirt into the basin instead of redistributing it. It's quiet, manual, and doesn't require electricity.
A full cleaning session with a Spin-Clean takes about an hour for twenty records. After the bath, records need to dry vertically on a rack for at least an hour—preferably two. The results are noticeably quieter playback, especially on older pressings that have never been washed.
4. Vacuum record cleaners
Vacuum machines are the professional standard. Units like the Record Doctor V or Pro-Ject VC-S2 ALU apply cleaning fluid to the record, scrub it with a brush, then vacuum the residue off through a velvet lip. They remove nearly all fluid and particulate in one pass.
They're louder. They're pricier. But for collectors with hundreds of records or dealers flipping thrift-store finds, a vacuum cleaner pays for itself in saved time and improved sound quality. Vinyl Me, Please recommends vacuum cleaning as the gold standard for any record that shows visible grime or plays with persistent surface noise.
| Method | Best For | Approx. Cost | Effectiveness |
|---|---|---|---|
| Carbon fiber brush | Dust removal before every play | $15–$30 | Light |
| Wet wipe / microfiber | Light grime, spot cleaning | $20–$50 | Moderate |
| Spin-Clean MKII bath | Deep cleaning 10–30 records | $80–$100 | High |
| Vacuum cleaner (Record Doctor, Pro-Ject) | Heavy grime, large collections | $300–$700 | Very High |
What cleaning solution should you use on vinyl records?
The safest store-bought solutions are those formulated specifically for vinyl—pH-neutral, alcohol-free or low-alcohol, and free of dyes or fragrances. Mobile Fidelity Sound Lab cleaning fluid, Audio-Technica AT6012 solution, and Spin-Clean's own washer fluid are all proven options. They lift oils without attacking the PVC substrate.
Some collectors mix their own. A popular DIY recipe blends distilled water, 99% isopropyl alcohol, and a few drops of Tergitol 15-S-9. The ratio matters. Most experienced cleaners use roughly one part alcohol to four parts water, with just a trace of surfactant. Too much alcohol can dry out vinyl over decades of repeated use (though occasional cleaning is perfectly safe). Too much surfactant leaves a film.
Worth noting: never use household glass cleaner, dish soap, or rubbing alcohol with additives. Windex contains ammonia. Dish soap leaves residue. Drugstore rubbing alcohol often has moisturizers or fragrances that deposit gunk into grooves. If the bottle doesn't say 99% pure isopropyl alcohol, don't put it near the collection.
How often should you clean your vinyl records?
Every record should be dry-brushed before each play. Deep wet cleaning only needs to happen when a record sounds noisy, looks cloudy, or arrives from a dusty source like a garage sale or thrift store. A well-stored record that plays quietly might go years between wet cleans.
New records benefit from an initial wash. Factory release agents—the lubricants used during pressing—sometimes remain on the surface and cause extra static or noise. A single pass through a Spin-Clean or a wet wipe often makes a new pressing sound noticeably better.
For active collectors who buy used vinyl regularly, a cleaning routine helps. Set aside one evening a month for a batch session. Clean ten to twenty records, let them dry, and swap them into fresh inner sleeves. The Library of Congress emphasizes that proper storage in clean, anti-static sleeves does more for long-term preservation than frequent washing. Washing fixes problems; good storage prevents them.
What should you never do when cleaning vinyl?
Avoid paper towels, t-shirts, and random household sprays. Paper towels scratch. T-shirts leave lint. Household chemicals strip stabilizers from the vinyl compound. Here's a quick rundown of the biggest mistakes:
- Don't clean labels. Getting a paper label wet can cause it to bubble, fade, or detach. Always keep fluid on the grooved area only.
- Don't use tap water. Minerals etch into the surface and cause white residue rings that are nearly impossible to remove.
- Don't stack wet records. Records must dry vertically. Stacking them flat while damp traps moisture and can warp the disc.
- Don't scrub against the grooves. Always wipe or brush in a circular motion, following the groove path. Radial scrubbing (across the grooves) drags debris through the delicate walls.
- Don't play a wet record. Water on the stylus damages the cantilever suspension and promotes oxidation on the tip. Wait until the record is completely dry.
"The groove is a precision spiral. Treat it like a lens, not a countertop. Gentle, consistent motion and the right fluid will outlast any aggressive scrubbing." — Riley Singh, vinylrecords.blog
One final detail that's easy to overlook: the inner sleeve matters. Old paper sleeves shed cardboard dust that re-contaminates a freshly cleaned record. Upgrading to anti-static, rice-paper-lined sleeves (brands like Mobile Fidelity or Diskeeper make excellent ones) keeps grooves cleaner for longer. After washing a record, slipping it into a clean sleeve is half the battle.
Cleaning vinyl at home isn't complicated, but it is specific. The right tools—a carbon fiber brush, a bath or vacuum system, distilled water, and a proper cleaning fluid—make the difference between a record that crackles and one that sings. Take the time to clean correctly, and the grooves will stay intact for decades of quiet, detailed playback.
Steps
- 1
Gather Your Cleaning Supplies and Prepare Your Workspace
- 2
Remove Surface Dust with a Carbon Fiber Brush
- 3
Deep Clean with a Record Cleaning Solution and Microfiber Cloth